顯示具有 sprinkler timer 標籤的文章。 顯示所有文章

2011年8月9日

Water timer makes your hanging plants live well

Hanging plants are a challenge to water, especially if they are high or scattered across the garden and patio. To save yourself the trouble of having to lug buckets and watering cans or drag long stretches of garden hose to keep your hanging plants hydrated, consider installing an automatic watering system that will take care of the chore for you. The one-time installation will make sure all your hard-to-reach plants are regularly and adequately watered without fail. 


It's not difficult to set up!


Go with Yi Zuo's professional water timer


~Things You'll Need~


Measuring tape
Backflow preventer
1" Polyethylene tubing
1/4" Polyethylene micro tubing
Drip irrigation connectors
Hose connectors and end cap
Emitters
Twist ties


~Step by Step~

1
Sketch the layout of the watering system. Draw the locations of the hanging plants relative to the water source.

2
Measure the distance between the water source and the farthest hanging plant to determine how long your main line (the 1-inch poly tubing) should be. Measure the heights of the hanging plants to determine the total length of the feeder lines (the 1/4-inch poly micro tubing) you will need. Depending on the locations of the plants, tap one feeder line to the main line and use it to water one hanging basket or branch out one feeder line to water several hanging plants at once.

3
Assemble the water system. Lay out the main line, attach the micro tubing lines to the main line, attach connectors to the micro tubing if branching out, then attach the emitters to the ends of the micro tubing. Attach hose connectors and end cap to the main line as needed.

4
Secure micro tubing feeder lines to the hanging baskets. Gravity and water pressure will eventually dislodge the emitters and micro tubing from the hanging baskets; twist ties will keep the tubing in place.

5
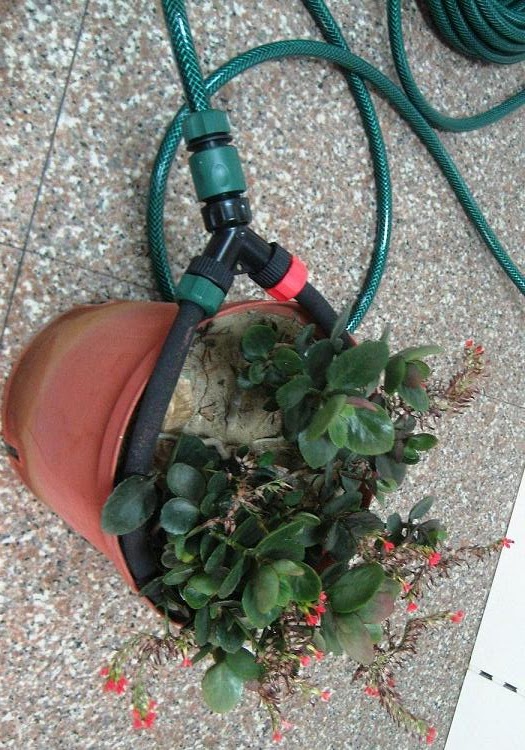
Connect the irrigation system to the water source. Attach the backflow preventer to the main line to ensure that water from the irrigation system does not flow back into the tap. Connect the water timer to the faucet to control the delivery of the water. Then attach the backflow preventer to the timer.

6
Test the water system. Turn the water on and check all the connectors and junctions for any leaks. Check the emitters for proper placement and effective watering, and take note if the water pressure is sufficient.

7
Set the timer. Choose the frequency and duration of the watering; the schedule should be adequate for all the hanging plants.

8
Check the water system regularly for clogged emitters, leaks and other maintenance issues.

Read more: How to Build a Water System for Hanging Plants | eHow.com http://www.ehow.com/how_5833858_build-water-system-hanging-plants.html#ixzz1UWYtIWhC


2011年7月20日

How to keep the garden sprinkler in good performance

Irrigating a home garden or lawn is a time-consuming job, it’s also exhausted your energy to care of every corner. Installing a sprinkler system will cut down the time you spend with a watering can in hand. Sprinkler systems run manually or on a timer that turns the sprinkler on and off at set times throughout the day. Clogs and garden activity can damage sprinklers. Troubleshooting properly prevents the need to rip up irrigation lines or scrap the entire system.


For the Above-Ground Sprinkler, here are some steps for you to check the sprinkler when it does not perform well.

1
Check the arm of the sprinkler to see if it is moving. Clean off any dirt or debris that may inhibit its movement. If it's broken, replace the sprinkler unit.

2
Inspect the hose for any leaks if puddles form in the yard or when the pressure of the water coming from the sprinkler is weak. Patch leaks with a hose patch kit.

3
Check the hose for any kinked areas, which may prevent water from coming through, and rearrange the hose if you find any.

4
Poke a pin through individual holes on the sprinkler to remove dirt if some holes are not spraying water.

Reminder
Inspect the sprinkler system at the beginning of the irrigation season for signs parts may be broken. Check for sprinklers sitting high out of the ground, tilted at an angle or those with broken plastic pieces.

Always inspect the position of sprinklers before mowing to prevent damage to the heads.


How To Install a Simple Drip Irrigation System

Drip irrigation doesn't just save water (and the money you pay for that water), it also saves time.


Here's How:
1.      Start with a small drip irrigation project: A vegetable garden laid out in rows or Shrubs around your house foundation can be watered efficiently with drip irrigation.

2.      Determine a water source: Any outdoor faucet can be used for an automatic drip irrigation system, provided you attach a Y-shaped valve hose connector as our PC-17 PLASTIC HOSE CONNECTOR WITH DUAL SHUT-OFF.
            Put it on upside down, so that the bottom of the "Y" attaches to the faucet. Attach one arm to the garden hose that will deliver water to the drip irrigation system. The other arm can be attached to an auxiliary garden hose for other watering needs.
3.    Start measuring: Draw a garden plan, showing the plants you want to water and how far apart they are. How much of hose length you need for your garden, you can also attach soaker hose for your little plant. Please see attached picture as our explanation.
         
     
4.    Gather your gear: You'll need a battery-operated timer for your drip irrigation system, which can be set like a clock to automate watering times. A pressure regulator / backflow valve is essential to prevent the drip irrigation water from backing up and ruining your household plumbing. Hose adaptors help, as do optional items such as a filter to keep rust and dirt out of the drip irrigation line and a fertilizer injector. Here attached are the pictures of attaching a WT-067 water timer with your garden tap, then to connect with PC-17 or PC-17 Hose Connector with Dual shut-off, then attached 3/4" or 1/2" Hose connector to connect hose or soaker hose as the figures as below:
   
    
5.   Assemble the drip irrigation lines first: Lay the hoses out in the sun to soften the plastic, so it's easier to work with. Cut the 1/4" hoses with scissors, and push the ends into the connectors to extend the lines toward your plants.
     
     
6.      Connect the flow from the faucet: Connect the remaining equipment from the tap in this order: Y-connector, timer, how connector, hose-thread adaptor, garden hose, soaker hose, sprinkler, and drip irrigation line. Your water supply is now linked to your drip irrigation system line. There are options of equipment for you to connect with, in accordance with your requirement. Please see the example as below figure:
     
7.      Test the drip irrigation system: Toggle the switch on the Y-shaped connector so water will run from the tap to your drip irrigation system. Set the timer on manual, and then set it to On. Turn on the tap. If you've done this correctly, you'll see the sprinkler start to spout like water dance. The other side of soaker hose will be properly drip water out to water your little lovely plant.
8.      Check for leaks: When you're satisfied with the water flow, turn the timer off but leave the tap turned on. You should hear the water stop running. This is the time to ensure there are no leaks between the tap and the other equipment. If there is leakage, you are probably using the wrong adaptor -–
9.      Set your automatic drip irrigation timer: Twenty minutes once a day is usually enough. Experiment with different amounts of watering time until you’re satisfied your plants are receiving adequate moisture.


2011年7月13日

The water timer which could reduce your bill and save your money!

Water timers are wonderful time saving inventions that can be purchased for as little as forty dollars or less. 

They enable you to set a predetermined schedule for a sprinkler to come on or to feed soaker hoses.

Plants thrive best when they are watered regularly. What causes shock to many bedding plants is too much cycling of dry and wet soil.

A water timer keeps you beds the same moisture all of the time, allowing roots to grow deeper, reducing water use.

You may want to start off at one time setting and gradually reduce it over the coming weeks as the soil loads up with moisture.

Keep the water timer out of direct sun or place some kind of shade over it since direct sunlight can shorten the life of the plastic housing and the batteries as well.

And …..
Battery irrigation timers are the most popular method for automatic watering, due to their easy programming and their reliability.

Check out our VOLUME WATER TIMER OF WF-8LCD.
-The power starts with 9V battery.  
-Special and different from other water timers is, if you have specific idea about how much water you want to use 
 only per day for watering your lawn or garden, the water timer has the options of 1~999 Liter/Gallon you can
 choose to set up. And from Mon ~ Sun whenever the day you need to water….
  
For example:
Watering one time a day (CYCLE TIME : 24 hrs)
If : TIME               6:00
   START              7:00
   Water Flow Volume    10 Lit (or Gal)     <for U.S. is Gal. / for Europe is Gal.>
   MIST CYCLE        30 %
      CYCLE TIME        1 DAY
   Watering will begin at 7:00
   Duration of watering time will be executed as :
       Waters 3 Lit/Gal, stop for 10min
       Waters 3 Lit/Gal, stop for 10min
       Waters 3 Lit/Gal, stop for 10min
       Waters 1 Lit/Gal, then stop

   <Total spend 30mins for STOP and watering times for 10 Lit./Gal.>
   The next START TIME will be renewed as 7:00 (7:00 + 24hrs) on the following day. So, CYCLE TIME : 1 DAY means watering one time a day.
   So, build-in programmed CYCLE TIME is 1 hour which calculated by programmer automatically.
   However, if CYCLE TIME set as 1 HR, which means that the START is sequentially shown 7:00, 8:00,
 9:00, 10:00……….. Which, also means watering 1 time per hour and repeats.
 Under such situation “CYCYLE TIME set up 1HR”, if watering time plus stop period longer than 1hour totally, the next START time till be delayed 1hour automatically.

 Basing on such rule, watering more than 1 time a day is shown as following table :

 Number of watering times           CYCLE TIME to be set    
1                          1 DAY
2                          12 HR
3                           8 HR
4                           6 HR
6                           4 HR
8                           3 HR
12                           2 HR
24                           1 HR

2011年6月21日

How to test the sprinkler timer you bought?


Many plants require water during the coolest part of the day, rather than the hottest. Some plants require a very small amount of water whereas others require a large amount of water. If you are concerned about your sprinkler timer not working when it should, test it to determine if it works properly

1. Although the exact method will vary depending on the brand and model of timer you own, the process is relatively similar for most models.
For example of our water timer #WT-058 :
Press the "Menu/O.K." button for 3 seconds on the control panel.
The prog. set as ON.
Then set up the weekdays of today
Set when to start watering time <set up 5mins later than current time>
Set the “Run Time” = watering period of how many minutes. <set 3 mins>
Set the Mist cycle for split the watering period. <set 1 mins>
Se the “Cycle time” from 1hour upto 7 days  <set 1hour>
Set which weekdays you wish to water your lawn with Raindrop icon <set today’s weekday>
All above step can press the up/down arrow to adjust the figures.
Once you finish the setting, the screen will flash once & get into set program.
< However since you are testing the sprinkler, set the watering time for 15 minutes from the current time of day.>
 
2. Press the "On" button on the control panel. The valve will open for 30 mins. And count down from 30 to 0 min. You can check it with your watch.

3. Wait for the sprinkler to come on. Timer it with a clock inside. The timer should come on at the exact time you set and then turn off after the exact duration you set. If it does not perform properly, you likely have a defective unit


Reference: How to Test Sprinkler Timers | eHow.com http://www.ehow.com/how_8188030_test-sprinkler-timers.html#ixzz1Py0ZTdgY